Turning an innovative product idea into a functional prototype can be challenging, especially when traditional manufacturing methods involve expensive tooling, long production times, and multiple design revisions. Fortunately, rapid prototyping with 3D printing makes it possible to transform digital designs into physical products faster and more affordably.
Whether you are developing an electronic device, creating a custom enclosure, designing mechanical components, or testing a new product concept, a rapid prototyping 3D printer can significantly simplify the product development process.
Instead of waiting for custom molds or manufacturing tools, engineers and designers can create 3D printed prototypes, evaluate their performance, identify design issues, and improve the final product through multiple iterations.
But how exactly does rapid prototyping work with a 3D printer? Which 3D printing technology should you use? And how can you create functional prototypes while minimizing development time and costs?
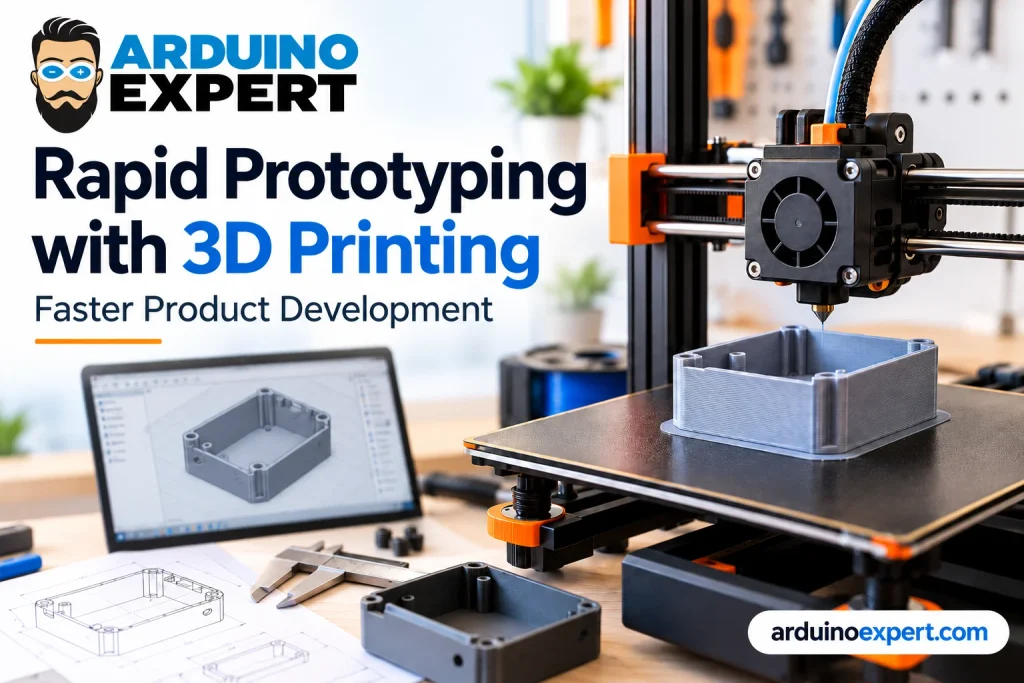
In this guide, we will explain how to use a 3D printer for rapid prototyping, explore different printing technologies and materials, and demonstrate how 3D printing helps accelerate product development.
What Is Rapid Prototyping in 3D Printing?
Rapid prototyping is the process of quickly creating physical models or functional prototypes of a product to evaluate its design, fit, and performance before full-scale manufacturing.
Traditional prototyping techniques often require specialized equipment, machining, molds, or extensive manual fabrication. These processes can be expensive and time-consuming, particularly when several design changes are required.
In comparison, 3D printing for rapid prototyping uses additive manufacturing technology to build physical objects directly from digital 3D models.
A 3D printer constructs the prototype layer by layer using materials such as thermoplastic filament, photopolymer resin, or polymer powder.
This approach allows product developers to:
- Convert CAD designs into physical prototypes.
- Test the dimensions, appearance, and functionality of a product.
- Identify engineering and assembly issues before manufacturing.
- Modify product designs without creating new molds or tooling.
- Produce custom parts and complex geometries.
- Develop and evaluate several design variations.
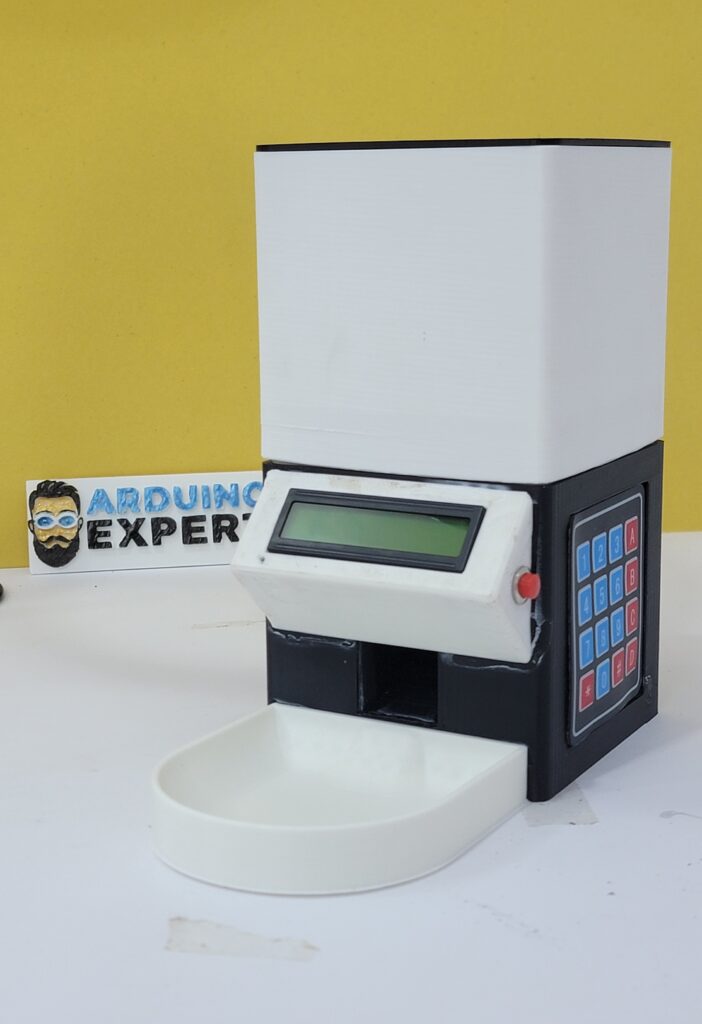
For example, an engineer developing an Arduino-based IoT device can use a 3D printer to create a custom electronics enclosure, check PCB mounting positions, test connector accessibility, and improve the housing before committing to production.
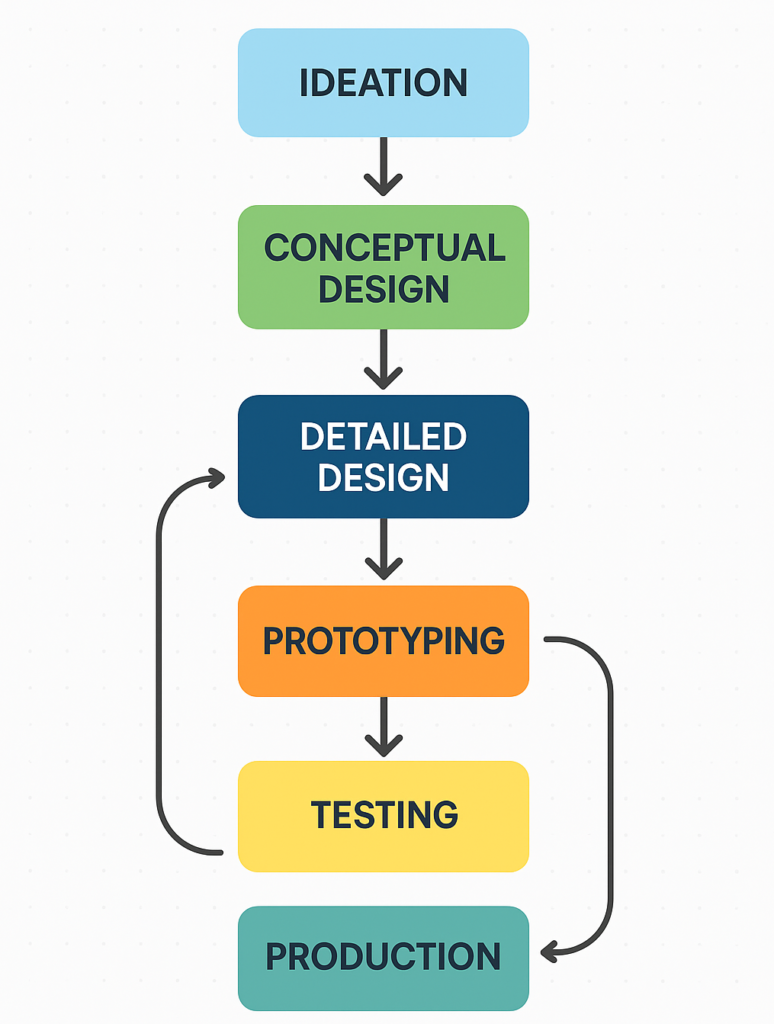
The main advantage of rapid prototyping is the ability to design, print, test, and improve products through faster development cycles.
Why Use a 3D Printer for Rapid Prototyping?
Using a 3D printer for rapid prototyping offers several advantages over traditional product development methods.
1. Faster Product Development
One of the biggest benefits of 3D printing rapid prototyping is reduced turnaround time between design iterations.
With conventional manufacturing, producing a single prototype can require several separate processes, including machining, tooling, fabrication, and assembly.
A 3D printer eliminates many of these steps by converting digital files directly into physical parts.
Depending on the size, complexity, technology, and material, some prototypes can be printed within a few hours, while others may require longer production and post-processing times.
This faster workflow allows engineers to test product designs earlier and make informed improvements before final production.
2. Lower Prototyping Costs
Traditional manufacturing techniques often involve setup costs, tooling expenses, and minimum order quantities.
With 3D printing, designers can create individual prototypes without investing in expensive production molds.
This makes 3D printing for product development particularly beneficial for startups, researchers, and businesses working with limited prototyping budgets.
It also allows teams to identify and correct design problems before investing in mass production.
3. Easy Design Modifications
Product development rarely follows a perfect design on the first attempt.
An enclosure may require additional space for a PCB, a mounting bracket may need reinforcement, or a connector opening may be incorrectly positioned.
With 3D printing, engineers can modify the CAD design and produce an updated prototype without rebuilding complex manufacturing tools.
This flexibility makes 3D printing highly suitable for iterative product development.
4. Functional Prototype Testing
Modern 3D printing technologies can produce more than visual models.
Depending on the selected material and printing technology, functional prototyping with 3D printing allows engineers to evaluate mechanical fit, moving parts, assembly, ergonomics, and certain operational loads.
For example, functional 3D printed prototypes can be used to test:
- Electronics enclosures and PCB mounting systems.
- Mechanical brackets and connectors.
- Robotic components and moving mechanisms.
- Product housings and assembly features.
- Hinges, clips, and snap-fit mechanisms.
- Custom tools, adapters, and fixtures.
However, 3D printed materials do not always behave exactly like injection-molded or machined production materials. Critical strength, temperature, and safety requirements must be validated separately.
5. Greater Design Freedom
3D printing supports complex shapes, customized features, and internal structures that may be difficult or expensive to manufacture through conventional methods.
This flexibility is useful for developing compact electronics products, customized mechanical components, and innovative product designs.
How to Use a 3D Printer for Rapid Prototyping: Step-by-Step Guide
A successful 3D printing prototype process involves more than simply downloading a 3D model and printing it.
To achieve reliable results, engineers should follow a structured workflow that connects design, manufacturing, testing, and product improvement.
Step 1: Define Your Product Requirements
Before starting the 3D design process, identify what you want to achieve with the prototype.
Ask yourself:
- What problem will the product solve?
- What are its required dimensions?
- Will the prototype be functional or only visual?
- Does it need to withstand mechanical stress?
- Will it contain electronic components?
- Does the design require moving parts?
- What conditions will the finished product operate under?
For example, if you are developing a smart home automation device using an ESP32 microcontroller, the enclosure should provide adequate room for the circuit board, connectors, wiring, sensors, and mounting features.
You may also need to consider ventilation, wireless signal performance, assembly requirements, and access to programming ports.
Clearly defining these requirements reduces unnecessary design changes later.
Step 2: Choose the Right 3D Printing Technology
Selecting the appropriate 3D printing method is essential for successful rapid prototyping.
The most common technologies include FDM, SLA, and SLS.
FDM (Fused Deposition Modeling)
FDM 3D printing uses a heated nozzle to deposit melted thermoplastic filament layer by layer.
It is widely used for affordable and functional prototypes, particularly when surface finish is less important than mechanical fit and general usability.
Best applications:
- Arduino and ESP32 enclosures.
- Mechanical brackets and supports.
- Product concept models.
- Robotic components.
- Custom fixtures and adapters.
- General functional prototype testing.
FDM rapid prototyping is often a practical starting point for product developers because materials are widely available and prototype production can be relatively inexpensive.
SLA (Stereolithography)
SLA 3D printing uses light-sensitive liquid resin to create highly detailed parts.
It is useful when a prototype requires fine details, intricate geometry, or a smooth surface finish.
Best applications:
- Detailed product models.
- Small precision components.
- Presentation prototypes.
- Complex miniature structures.
- Parts requiring a refined surface appearance.
SLA 3D printing prototypes require washing and curing, and their mechanical properties depend on the resin selected.
SLS (Selective Laser Sintering)
SLS 3D printing uses a laser to fuse polymer powder into solid objects.
It is commonly used for complex functional parts and applications where support-free printing of intricate geometries is beneficial.
Best applications:
- Functional engineering prototypes.
- Complex mechanical assemblies.
- Nylon components.
- Durable product housings.
- Small-batch manufacturing.
SLS equipment is generally more expensive than desktop FDM printers, so outsourced production is often appropriate for smaller development teams.
FDM vs SLA vs SLS for Rapid Prototyping
| Feature | FDM | SLA | SLS |
|---|---|---|---|
| Printing material | Thermoplastic filament | Photopolymer resin | Polymer powder |
| Prototype cost | Generally low | Low to moderate | Often higher for individual parts |
| Surface finish | Visible layer lines | Usually smooth and detailed | Typically textured |
| Functional testing | Good with suitable materials | Depends on resin | Good with engineering-grade powders |
| Ideal applications | Enclosures, brackets, general prototypes | Detailed models and precision features | Complex functional parts |
| Post-processing | Support removal and optional finishing | Washing, curing, support removal | Cooling and powder removal |
Which is the best 3D printer for rapid prototyping?
For many everyday engineering and product development projects, an FDM printer is a cost-effective starting point.
However, the best 3D printer for engineering prototypes depends on the required accuracy, material properties, surface finish, prototype dimensions, and intended testing conditions.
If you are comparing a resin vs filament 3D printer for prototyping, begin by identifying the type of prototype you need rather than choosing the fastest or most expensive machine.
Step 3: Create a 3D CAD Model of Your Prototype
The next step is to create a digital model using computer-aided design (CAD) software.
Popular 3D modeling tools include:
- SolidWorks
- PTC Creo
- Autodesk Fusion
- FreeCAD
- Onshape
CAD software allows designers to create accurate 3D models and modify dimensions, features, and assemblies.
For successful rapid prototyping, pay close attention to:
Dimensional accuracy: Ensure that the prototype matches the intended dimensions and fits with other components.
Wall thickness: Design walls that are appropriate for the selected material, nozzle size, and mechanical requirements.
Assembly clearances: Leave suitable gaps between moving or mating components.
Mounting features: Include screw holes, mounting bosses, brackets, and appropriate support structures.
Connector accessibility: Provide enough space for USB connectors, switches, sensors, and cables.
Printability: Consider overhangs, support requirements, print orientation, and material limitations.
For electronics enclosure 3D printing, a properly designed CAD model is particularly important because it determines how securely the PCB and internal components will fit.
Once the model is complete, export it into a suitable format for 3D printing, such as STL or 3MF.
Keep an editable CAD version, such as a native project file or STEP model, for future revisions and manufacturing.
Step 4: Select the Best 3D Printing Material for Your Prototype
Choosing the correct material directly influences a prototype’s strength, flexibility, durability, heat resistance, and appearance.
Common 3D printing materials include:
| Material | Main characteristics | Typical applications |
|---|---|---|
| PLA | Easy to print, rigid, relatively low heat resistance | Visual models and early concept prototypes |
| PETG | Tough, useful layer adhesion, better practical heat resistance than standard PLA | Electronics enclosures and functional parts |
| ABS | Tough, heat-resistant relative to PLA, but prone to warping | Mechanical housings and engineering prototypes |
| ASA | Weather-resistant and suitable for many outdoor applications | Outdoor enclosures and equipment housings |
| TPU | Flexible and elastic | Protective covers, flexible components, and vibration-damping parts |
| Nylon (PA) | Tough and suitable for many wear-resistant applications | Functional mechanical components and industrial prototypes |
| Engineering resin | Properties vary by resin formulation | Detailed and application-specific prototypes |
PLA vs PETG for Prototyping
PLA is generally easier to print and suitable for checking product dimensions, appearance, and basic assembly.
PETG is often preferable when additional toughness, impact resistance, or practical durability is required.
For instance, an Arduino 3D printed enclosure used for basic indoor fit testing may work well in PLA. A more durable functional enclosure may benefit from PETG or another engineering material.
The best 3D printing material for functional prototypes always depends on the final operating conditions.
Step 5: Prepare the Design Using Slicing Software
Once the 3D model is ready, it must be processed using slicing software.
A slicer converts the digital 3D model into machine instructions that tell the printer how to manufacture the object.
Common slicing applications include:
- PrusaSlicer
- Cura
- OrcaSlicer
- Bambu Studio
During preparation, configure important settings such as:
Layer height: Smaller layers can improve visible detail but may increase print time.
Infill density: Internal infill influences material usage, weight, and some aspects of mechanical performance.
Wall thickness and perimeters: Additional perimeter walls can improve strength and provide better mounting surfaces.
Print orientation: Orientation affects surface quality, support requirements, dimensional accuracy, and strength.
Print supports: Supports may be necessary for overhangs and complex geometry.
Printing temperature: Nozzle and bed temperatures must match the selected filament and printer.
For functional prototypes, printing orientation and wall design can be more important than simply increasing infill density.
Before starting the print, review the slicer’s preview to identify potential problems.
Step 6: Print Your First Prototype
After configuring the printer, start manufacturing your first physical prototype.
For early testing, you do not always need to print an entire product.
Instead, consider printing only the most important components.
For example, when developing an electronics enclosure, you might first print a small section containing a screw boss, connector opening, and snap-fit feature.
This approach helps validate critical dimensions without consuming time and materials on a complete assembly.
Once the test features perform correctly, print the full prototype.
During printing, monitor:
- First-layer adhesion.
- Material extrusion quality.
- Warping or deformation.
- Support structures.
- Surface defects.
- Dimensional consistency.
After printing, allow the part to cool as appropriate, remove supports, and complete any required finishing operations.
Step 7: Test Your 3D Printed Prototype
Testing is one of the most important stages of rapid prototyping.
A visually appealing prototype does not necessarily mean that a product is mechanically or functionally ready.
Depending on the project, perform the following evaluations.
Dimensional testing: Use calipers or other appropriate measuring tools to check critical dimensions.
Assembly testing: Verify that components, covers, screws, connectors, and mechanical parts fit together.
Functional testing: Test moving mechanisms, operating controls, and relevant mechanical functions.
Electronics integration: Install the PCB, sensors, wiring, and connectors to ensure the enclosure supports the device correctly.
Mechanical testing: Evaluate strength, stiffness, or repeated assembly when those properties matter.
Environmental testing: Where necessary, assess exposure to heat, moisture, sunlight, or vibration using a suitable test procedure.
Record every significant issue so that the next design revision addresses a specific problem.
Step 8: Improve the Design Through Rapid Iteration
One of the biggest advantages of rapid prototyping with 3D printing is the ability to quickly improve a product using feedback from physical testing.
For example:
Prototype Version 1: The PCB fits, but the USB connector is difficult to access.
Prototype Version 2: The USB opening is enlarged, but the lid does not align properly.
Prototype Version 3: The enclosure dimensions and lid mounting mechanism are improved.
Prototype Version 4: The design passes the intended assembly and functional checks.
Each iteration helps reduce uncertainty and refine the product design.
Rather than treating repeated printing as a waste of time, consider it a controlled development process that helps prevent costly mistakes during production.
Step 9: Prepare the Validated Prototype for Manufacturing
After completing the required prototype testing, prepare the design for its intended manufacturing process.
A 3D printed prototype may work well for evaluation, but some features must be redesigned if the final product will use injection molding, CNC machining, or another production method.
Important considerations include:
- Production material selection.
- Manufacturing tolerances.
- Parting lines and draft angles for injection molding.
- Assembly and fastening methods.
- Component availability.
- Mechanical performance.
- Production costs.
- Quality control requirements.
This transition from prototype to production is an essential stage of successful product development.
Practical Example: Rapid Prototyping an ESP32 Electronics Enclosure
To understand how rapid prototyping works in a real product development workflow, consider a hypothetical project involving an ESP32-based environmental monitoring device.
The product contains an ESP32 development board, environmental sensors, a power connection, and a custom enclosure.
The goal is to create a compact housing that protects the electronics while providing access to connectors and sensors.
Stage 1: Electronics and Mechanical Planning
Begin by identifying the exact ESP32 board, sensor modules, and other internal components.
Measure the circuit board, component heights, mounting positions, and connector dimensions.
Create a layout showing where the electronics will be positioned inside the enclosure.
Stage 2: Enclosure CAD Design
Develop a 3D enclosure model using CAD software.
Include features such as:
- PCB mounting posts.
- Sensor openings.
- USB connector access.
- Cable routing.
- Cover mounting features.
- Ventilation openings where required.
For an ESP32 3D printed enclosure, also consider antenna clearance and the possible effect of nearby materials on wireless performance.
Stage 3: First Prototype Printing
Use FDM 3D printing with PLA to create an initial enclosure for dimensional and assembly testing.
Install the ESP32 board and sensors inside the printed housing.
Evaluate the fit of the components, the alignment of mounting holes, and the accessibility of connectors.
Stage 4: Functional Testing and Improvement
Suppose the first printed design shows that the USB cable cannot be inserted easily.
Update the CAD model to increase the connector clearance, then print a small test section or an updated enclosure.
If the design requires improved durability, evaluate whether PETG or another suitable material provides the necessary characteristics.
Stage 5: Final Prototype Validation
Once the components fit properly, perform the relevant assembly, operational, and environmental tests.
The result is a more thoroughly validated prototype that can support subsequent design-for-manufacturing work.
This example illustrates how PCB enclosure 3D printing helps integrate electronics and mechanical design early in development.
The same process can be applied to Arduino products, robotics components, smart home devices, and industrial IoT systems.
Important 3D Printing Design Guidelines for Prototyping
Good design decisions can significantly improve print quality and reduce the number of revisions required.
1. Account for Printing Tolerances
3D printers cannot reproduce every dimension with perfect accuracy.
Actual results depend on the printer, material, calibration, orientation, and geometry.
When designing mating parts, a small clearance is usually necessary.
For example, a starting clearance of around 0.3 mm may be useful for some FDM moving-part designs, but it is not a universal specification.
Always use test prints to determine suitable 3D printing tolerances for electronics enclosures and other precision assemblies.
2. Optimize the Printing Orientation
Parts printed using FDM technology often exhibit different mechanical properties depending on the direction of loading.
Position the prototype to reduce the risk of failure at weak layer interfaces.
3. Avoid Unnecessary Support Structures
Complex overhangs may require supports, increasing material consumption and post-processing time.
Where possible, use chamfers, design modifications, or alternative orientations to reduce support requirements.
4. Test Critical Features Individually
For a 3D printed snap-fit enclosure, test a small section of the clip and mating feature before printing the entire housing.
The same principle applies to screw bosses, hinges, and precision connectors.
5. Design for the Intended Manufacturing Process
A design that prints successfully may not be suitable for mass production without modifications.
If injection molding is the intended manufacturing method, consider production constraints during the prototype design process.
How Much Does It Cost to 3D Print a Prototype?
The 3D printed prototype cost depends on several factors, including the size of the part, material selection, printing technology, print time, required accuracy, and post-processing.
Some of the most important cost factors include:
| Cost factor | How it affects prototype pricing |
|---|---|
| Part size | Larger parts usually require more material and machine capacity |
| Material type | Engineering materials and specialized resins may cost more |
| Printing technology | FDM, SLA, and SLS have different operating and processing costs |
| Design complexity | Intricate geometries may increase preparation and finishing requirements |
| Print time | Longer prints use more machine capacity |
| Surface finishing | Sanding, painting, polishing, or specialized finishing adds labor |
| Quantity | Multiple units may change the per-part cost |
| CAD design work | Creating or modifying a 3D model may involve additional engineering effort |
How to Reduce Rapid Prototyping 3D Printing Costs
To make the development process more cost-effective:
- Print only essential features during early testing.
- Use affordable materials for initial concept validation.
- Reduce unnecessary material and support structures.
- Optimize the printing orientation.
- Test small components before printing large assemblies.
- Avoid cosmetic finishing until the design is validated.
- Review your CAD model carefully before printing.
For many projects, the most effective cost-saving strategy is to discover and resolve design problems early.
If you need a professional cost estimate, a 3D printing prototype service can evaluate your CAD model, material requirements, dimensions, and preferred finishing options.
Applications of 3D Printing in Rapid Product Development
3D printing technology supports a wide variety of prototyping and manufacturing applications.
Electronics Enclosures and PCB Housings
Electronics enclosure 3D printing is widely used to develop custom housings for Arduino, ESP32, Raspberry Pi, and other electronic systems.
It allows engineers to validate PCB dimensions, connector positions, mounting arrangements, and overall product appearance.
A custom 3D printed electronics enclosure is particularly useful when commercially available enclosures cannot accommodate a specific PCB layout.
Robotics and Automation
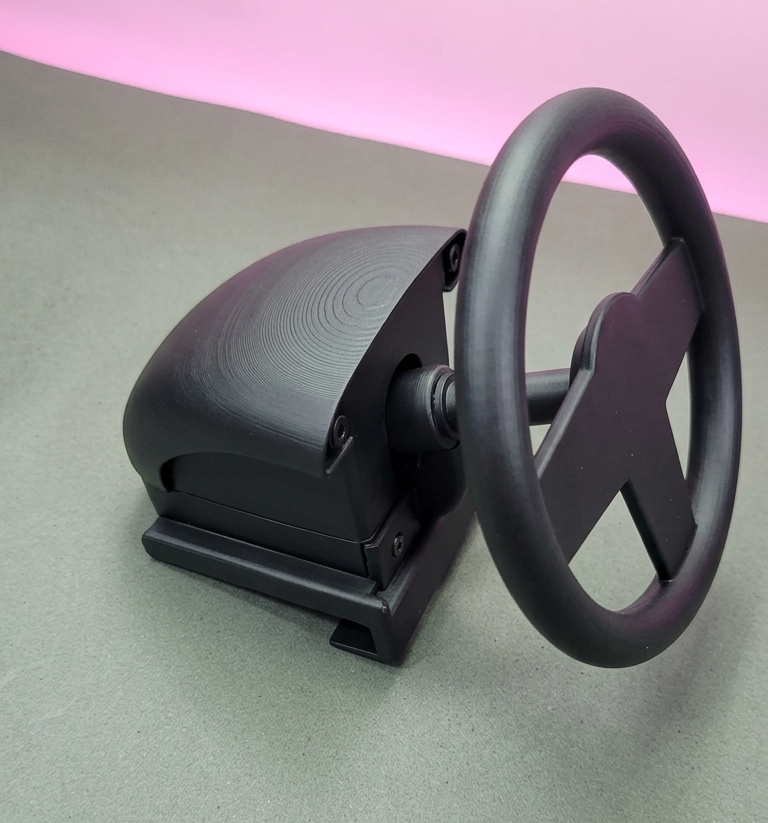
Robotics prototype 3D printing enables the development of mechanical components such as brackets, robotic grippers, sensor mounts, and lightweight structural parts.
Engineers can test assembly configurations and modify components before manufacturing final parts.
IoT and Smart Devices
IoT devices frequently require customized enclosures that integrate sensors, wireless modules, displays, and power components.
3D printing allows product developers to create compact housings tailored to the device’s electronic architecture.
Consumer Product Development
Product designers can use 3D printing to evaluate the size, shape, ergonomics, and overall appearance of consumer products.
Physical prototypes also help teams present concepts to stakeholders and collect user feedback.
Mechanical Engineering
3D printing is useful for developing mechanical parts, assembly fixtures, adapters, and experimental components.
It allows engineers to validate design concepts and assess mechanical fit before investing in conventional manufacturing.
Startups and Hardware Product Development
For startups, rapid prototyping can make early product development more accessible.
Instead of investing heavily in tooling before validating an idea, startups can produce custom 3D printed prototypes, test their assumptions, and refine their product concepts.
This makes 3D printing especially useful during proof-of-concept development and the creation of early hardware demonstrations.
Rapid Prototyping vs Traditional Prototyping
Both 3D printing and traditional manufacturing have important roles in product development.
However, their advantages differ depending on the project’s stage, geometry, materials, and production requirements.
| Factor | 3D Printing Rapid Prototyping | Traditional Prototyping |
|---|---|---|
| Setup requirements | Usually low for individual printed parts | May require machining setup or tooling |
| Design modifications | Often simple to implement digitally | May require additional setup or new tooling |
| Complex geometries | Often easier to produce | Can be more difficult depending on the process |
| Prototype quantities | Well suited to small quantities | Varies by process and setup |
| Material options | Limited to compatible printing materials | Wider access to production-grade material forms |
| Surface finish | Depends on technology and finishing | Often better with selected manufacturing processes |
| Mass production | Not always the most economical choice | Frequently preferable at higher production volumes |
For early design validation, 3D printing often provides an efficient path from CAD design to a physical prototype.
For final manufacturing, however, traditional processes may offer better economics, material properties, or production consistency.
The ideal product development strategy often combines multiple manufacturing technologies.
How to Choose the Right 3D Printing and Prototyping Services
Choosing the right prototyping partner is important when your project requires more than basic 3D printing.
A professional service provider should understand both the physical design and the intended function of the product.
Before selecting a rapid prototyping 3D printing service, consider:
CAD design capabilities: Can the provider create or modify your 3D model?
Material expertise: Can the team recommend appropriate materials for your requirements?
Dimensional accuracy: Can the printing process achieve the fit and tolerances your project needs?
Engineering experience: Does the provider understand mechanical design, assembly, and product development?
Electronics integration: Can the team design housings around PCBs, sensors, and embedded devices?
Revision support: Can the provider help improve the design after initial testing?
Manufacturing preparation: Can the team support the transition from prototype to production?
For electronics products, working with a team that understands both PCB design and mechanical enclosure development can reduce integration problems.
Professional 3D Printing and Rapid Prototyping Services at Arduino Expert
At Arduino Expert, we help engineers, startups, researchers, and businesses turn product concepts into physical prototypes through professional 3D design, modeling, and printing services.
Our expertise extends beyond 3D printing to include electronics development, PCB design, embedded systems, IoT devices, and product development.
Our 3D Printing Services
We provide professional 3D printing services for a range of prototyping applications, including:
- Functional product prototypes.
- Custom 3D printed parts.
- Electronics enclosures and PCB housings.
- Mechanical components.
- Arduino and ESP32 project enclosures.
- Custom hardware prototypes.
- Product models and development projects.
Whether you already have a 3D design file or need assistance creating one, our team can help bring your concept closer to a testable physical product.
3D Design and Modeling for Product Development
A successful prototype starts with a well-designed CAD model.
Our 3D Design and Modeling Services focus on product design, electronics enclosures, mechanical components, and PCB-compatible housings.
We help prepare designs for prototyping and appropriate manufacturing processes while considering functional requirements and assembly constraints.
From Product Idea to Functional Prototype
For projects that combine electronics and mechanical design, we also offer Product Design and Development Services.
By bringing together mechanical modeling, PCB design, embedded systems, and prototyping, we help clients progress from early concepts toward validated product designs.
If you are looking for custom 3D printing for startups, engineering prototypes, or 3D printing services in Pakistan, explore our services and discuss your project requirements with our team.
Conclusion
Rapid prototyping with 3D printing has transformed how engineers, designers, and businesses develop physical products.
By turning digital CAD models into functional prototypes, product development teams can test their ideas, identify design problems, and improve products through repeated iterations.
From electronics enclosures and robotic components to custom mechanical parts and IoT products, 3D printing provides a flexible approach to early product development.
However, achieving good results requires more than selecting a 3D printer. Proper CAD modeling, material selection, print preparation, functional testing, and design optimization are equally important.
Whether you are developing your first product concept or refining an existing design, incorporating rapid prototyping into your workflow can help reduce development uncertainty and support faster, better-informed engineering decisions.
Start Your Rapid Prototyping Project with Arduino Expert
Have a product idea that needs a custom 3D printed prototype?
At Arduino Expert, we provide 3D printing, CAD modeling, electronics enclosure design, and product development services to help you move from concept to prototype.
Whether you need a custom Arduino enclosure, an ESP32 product housing, a mechanical component, or a complete hardware prototype, our team can help you evaluate your design requirements and develop a suitable solution.
Frequently Asked Questions
What is rapid prototyping in 3D printing?
Rapid prototyping is the process of quickly creating physical models or functional prototypes from digital designs. Using 3D printing, engineers can manufacture prototypes, evaluate their performance, and make design improvements before final production.
How does rapid prototyping work with a 3D printer?
The process begins with creating a CAD model, selecting the printing technology and material, and preparing the file using slicing software. The printer produces the physical prototype, which is then tested and modified as required.
Which 3D printer is best for rapid prototyping?
The best 3D printer for rapid prototyping depends on your application. FDM printers are often suitable for affordable functional parts and enclosures, SLA printers are useful for fine details and smooth surfaces, while SLS systems support complex engineering components.
How much does it cost to 3D print a prototype?
The cost depends on the prototype’s size, material, printing technology, complexity, quantity, and finishing requirements. Small FDM prototypes are often relatively inexpensive, while larger or specialized engineering parts may cost significantly more. A precise quote requires project details.
How long does it take to 3D print a prototype?
Simple components may take only a few hours to print, while large, complex, or high-resolution prototypes can require considerably more time. Design preparation, post-processing, testing, and shipping can also affect total turnaround time.
Is FDM or SLA better for rapid prototyping?
FDM is often the preferred option for economical mechanical prototypes, brackets, and electronics enclosures. SLA is useful for prototypes requiring finer details and smoother surfaces. The choice depends on the material properties, geometry, appearance, and performance requirements.
Can 3D printers create functional prototypes?
Yes. With the appropriate material, design, and printing process, 3D printers can create functional prototypes for evaluating mechanical fit, assembly, movement, and selected operating conditions. Critical performance requirements should still be validated through appropriate engineering tests.
What material is best for 3D printed prototypes?
PLA works well for many visual models and initial fit tests. PETG, ABS, ASA, nylon, TPU, and specialized resins may be more suitable for applications requiring specific mechanical, thermal, weather-resistance, or flexibility properties.
Can I use 3D printing for Arduino and ESP32 enclosures?
Yes. 3D printing is widely used to create custom Arduino and ESP32 enclosures with PCB mounting posts, connector openings, sensor cutouts, and specialized mechanical features. It is especially useful when standard commercial enclosures do not match your hardware.
Is rapid prototyping suitable for startups and small businesses?
Yes. Rapid prototyping allows startups to validate ideas and improve product designs without committing immediately to expensive tooling. It is particularly useful for early hardware development, proof-of-concept models, and low-volume prototype testing.