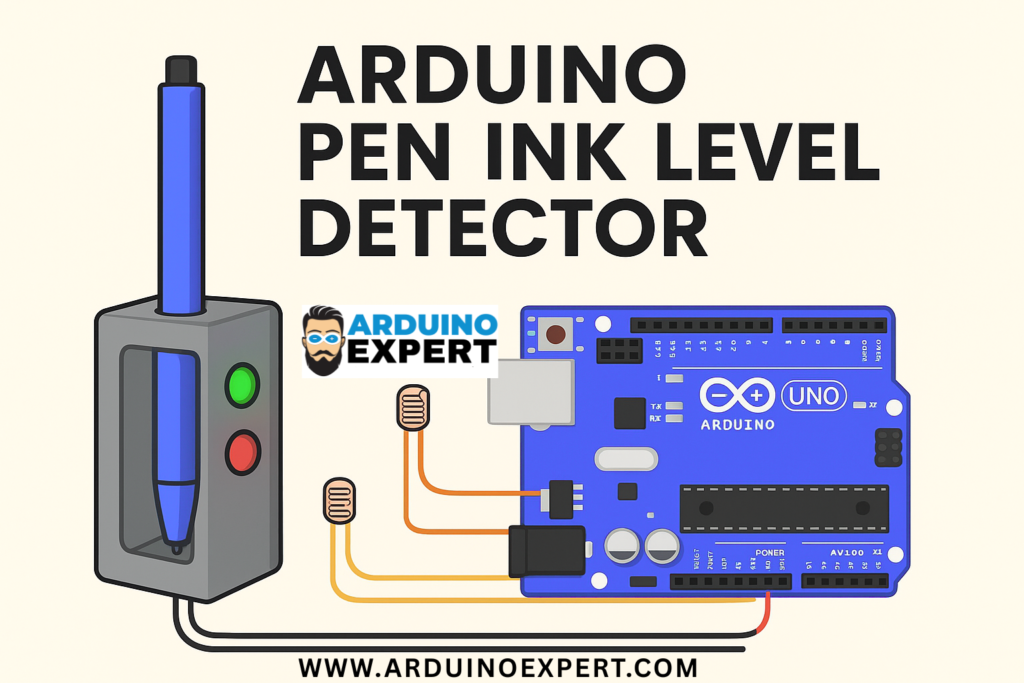
Developing innovative solutions for everyday problems often requires a blend of Product Design and Development, practical electronics, and creative thinking. The Pen Ink Detector with Arduino is a perfect example of how technology can be applied to something as simple as monitoring pen ink levels. Running out of ink in the middle of writing is frustrating, especially for students, artists, and professionals. To solve this, we can design a Pen Ink Detector using Arduino Uno, Light Dependent Resistors (LDRs), and LED indicators. This project combines 3D Design and Modeling to create a custom-printed casing that securely holds the pen, sensors, and LEDs, while ensuring both functionality and aesthetics. On the electronics side, Arduino programming is used to process data from LDR sensors and control LED indicators, providing a clear and user-friendly way to check whether the ink is sufficient or running low. By merging mechanical design, electronics, and coding, this project highlights the importance of multidisciplinary skills in modern product innovation and serves as a practical learning experience for students, makers, and hobbyists interested in real-world applications of engineering design.
The device works on the principle of light intensity detection. LDR sensors are placed at two different levels (low and high) inside the casing, while LEDs are used to indicate whether the pen still has enough ink or if it’s running out. This compact project not only teaches the use of sensors and Arduino but also combines electronics with 3D printing for a real-world application.
Components Required for Pen Ink Level Detector:
- Arduino Uno – The microcontroller to process LDR readings.
- Two LDR (Light Dependent Resistors) sensors – For detecting ink presence at low and high levels.
- Two LEDs (Green & Red) – Green indicates sufficient ink, Red indicates low ink.
- Resistors (10kΩ) – Used with LDR sensors.
- Jumper Wires & Breadboard – For circuit connections.
- 3D-Printed Pen Casing – Custom-designed to hold the pen, LEDs, and LDR sensors.
- USB Cable & Power Supply – To power the Arduino Uno.
Working Principle of Pen Ink Level Detector:
- The LDR sensors detect changes in light intensity depending on the ink presence.
- If the pen ink covers the sensor area, less light passes through, and the Arduino interprets it as “ink present.”
- If the ink level drops below the sensor, more light passes through, indicating “no ink.”
- Two LDRs are placed at low level and high level in the pen casing:
- High-Level LDR: Detects whether the pen is filled with sufficient ink.
- Low-Level LDR: Detects if the ink has dropped below the minimum required level.
- The Arduino reads the analog signals from both LDRs and controls the LEDs accordingly:
- Green LED ON → Ink is sufficient.
- Red LED ON (or blinking) → Ink level is low.
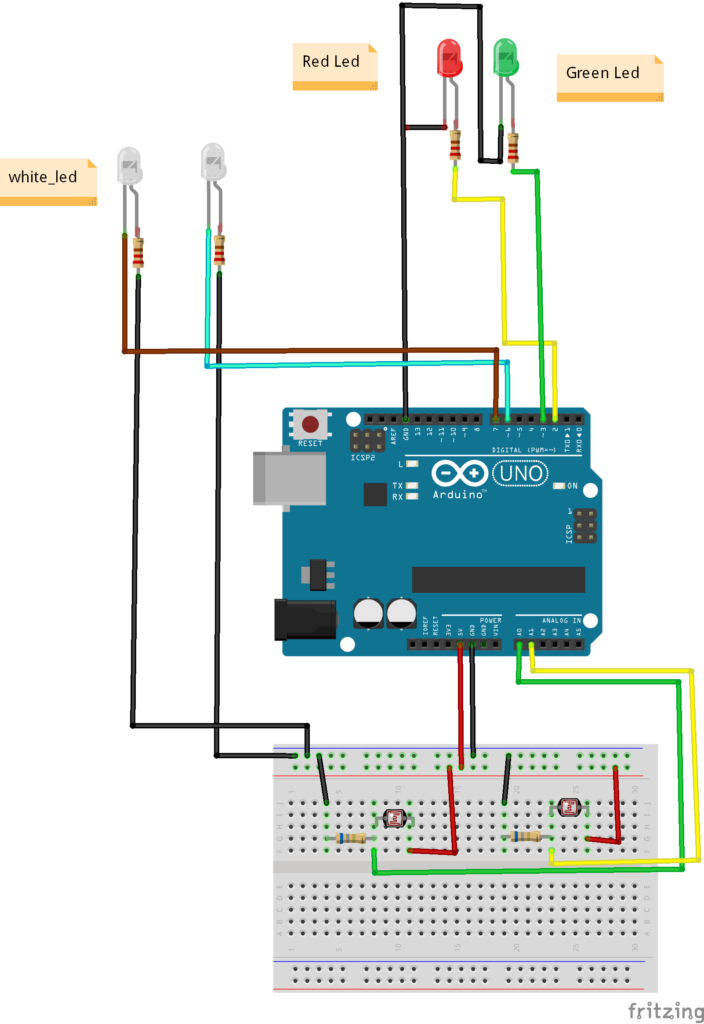
Circuit Diagram of Pen Ink Level Detector with Arduino:
- LDR 1 (High level) → Connect to Arduino analog pin A0 with a 10kΩ resistor.
- LDR 2 (Low level) → Connect to Arduino analog pin A1 with a 10kΩ resistor.
- Green LED → Connect to digital pin 8 with a 220Ω resistor.
- Red LED → Connect to digital pin 9 with a 220Ω resistor.
- Power the circuit using Arduino 5V and GND pins.
Arduino Code for Pen Ink Level Detector:
We used Arduino Programming Language for code of Pen Ink Detector device. Code is given below.
// Pen Ink Detector with Arduino Uno

int ldrHigh = A0;
int ldrLow = A1;
int greenLED = 3;
int redLED = 2;

int threshold = 500; // Adjust based on light conditions

void setup() {
  pinMode(greenLED, OUTPUT);
  pinMode(redLED, OUTPUT);
  Serial.begin(9600);
}

void loop() {
  int highLevel = analogRead(ldrHigh);
  int lowLevel = analogRead(ldrLow);

  Serial.print("High Sensor: "); Serial.print(highLevel);
  Serial.print(" | Low Sensor: "); Serial.println(lowLevel);

  if (highLevel < threshold && lowLevel < threshold) {
    // Ink is full
    digitalWrite(greenLED, HIGH);
    digitalWrite(redLED, LOW);
  }
  else if (lowLevel >= threshold) {
    // Ink is low
    digitalWrite(greenLED, LOW);
    digitalWrite(redLED, HIGH);
  }
  else {
    // Ink at mid-level
    digitalWrite(greenLED, HIGH);
    digitalWrite(redLED, HIGH);
  }

  delay(500);
}
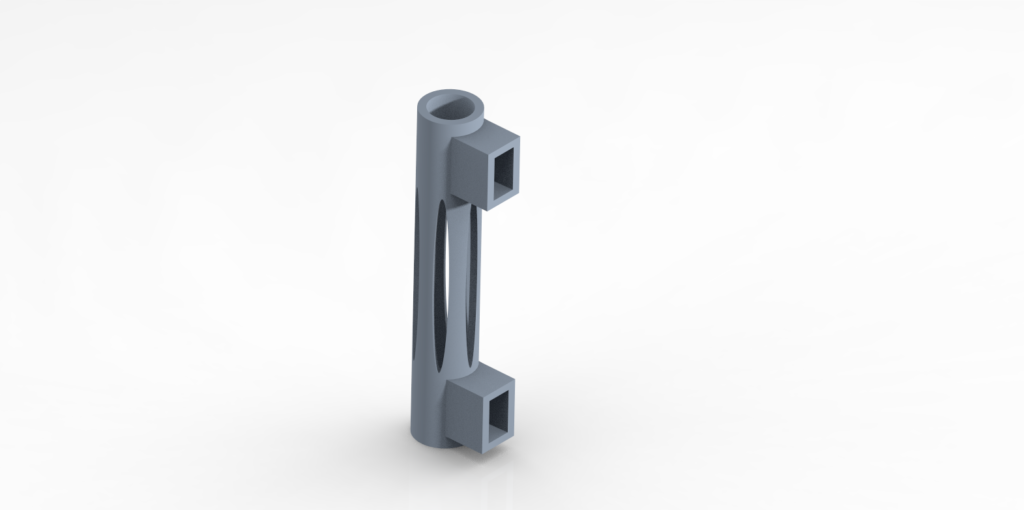
3D Design and 3D Printing of Casing of Pen Ink Level Detector:
We used SolidWorks for 3D Design and Modeling for Casing of Pen Ink Detector. The 3D-printed casing holds the pen in place while aligning the LDR sensors and LEDs. The casing has two small windows at different levels for light to pass through and for the sensors to detect ink levels. The LEDs are placed on the outer side for easy visibility. This makes the project compact, portable, and easy to demonstrate.
Applications of Pen Ink Detector:
- Students & Office Use: Quickly check pen ink levels.
- Educational Projects: Great for learning about Arduino, sensors, and 3D printing.
- Innovation Demonstration: Showcasing how IoT and electronics can be applied to everyday objects.
Conclusion
The Arduino Pen Ink Level Detector is an innovative and practical project that combines Arduino programming, LDR sensors, and 3D printing into a functional device. It’s simple to build, cost-effective, and highly useful for students, makers, and hobbyists.
This project not only helps in detecting ink levels but also encourages creative thinking by applying electronics to solve real-life problems.
Need This Project?
If you need this Pen Ink Level Detector Project with or without Modifications or Customization then you can contact us through WhatsApp. We can deliver you the Fully Functional Project with Hardware/Components Shipment:
if you can not make this project yourself then you can use this option. We will assemble the Project and will ship it to your Doorstep with Safe Packaging.
Learn More about the services we offer.