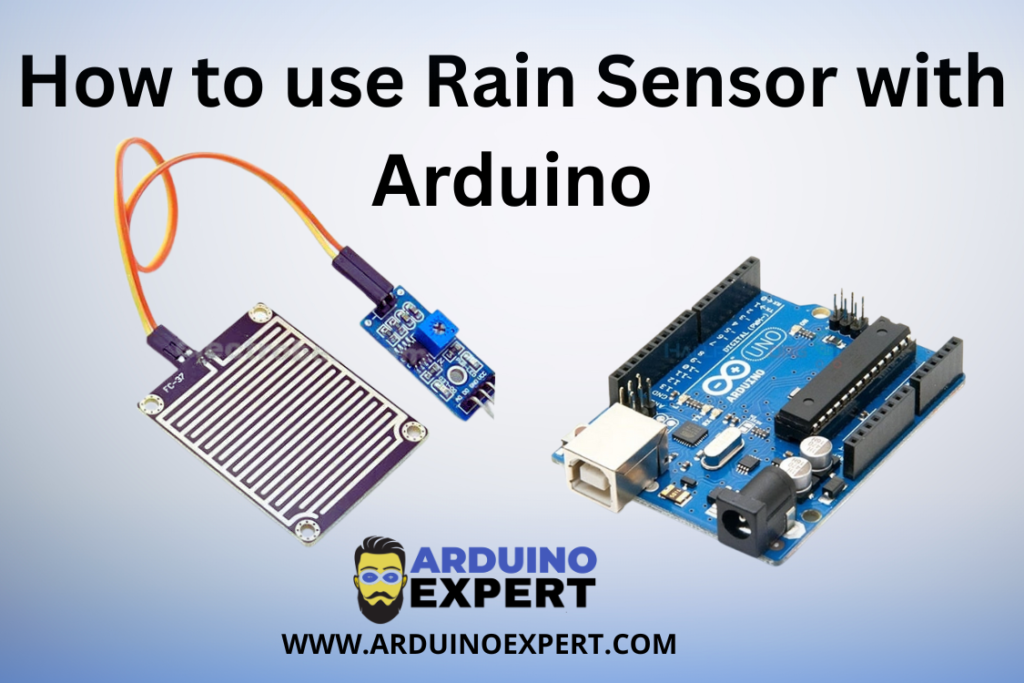
Weather-based automation is increasingly popular in smart systems, and rain detection is a key feature in many such applications. The Rain Sensor Module allows you to detect moisture or rain drops in the environment. It is simple, inexpensive, and easy to integrate with an Arduino for weather monitoring, smart irrigation, or automated roofing systems.
In this blog, you’ll learn how the rain sensor works, how to connect it to your Arduino board, and how to write a simple code to detect and respond to rainfall.

What is a Rain Sensor?
The Rain Sensor Module is a simple device used to detect water drops or rainfall. It usually comes in two parts:
- Sensing Plate – a PCB with exposed traces that detect water.
- Control Module – conditions the signal and provides both digital and analog outputs.
Key Features:
- Operating Voltage: 3.3V to 5V
- Digital and Analog Outputs
- Adjustable sensitivity (via onboard potentiometer)
- Output LED indicator
- Compact and easy to interface with microcontrollers

Rain sensor is used to monitor the rain and send closure requests to electronic shutters, windows, awnings or skylights whenever the rain is detected.
How Rain Sensor works?
The working of rain sensor is very easy. The sensing pad with exposure copper traces, work as a variable resistor (like a potentiometer) whose resistance changes according to the water level on its surface. The resistance is inversely proportional to the amount of water.
• When more water is on the surface of sensing the pad it means conductivity will increase and resistance will decrease.
• When lesser water is on the surface of sensing the pad it means conductivity will decrease and resistance will increase.
Hardware Overview of Rain Sensor Module:
A rain sensor has two components.
Rain Sensor Sensing Pad:
The sensor consist of a sensing pad with series of copper traces that work as a variable resistor. Place this pad outside in the open possibly over the roof or where it can be affected by rainfall.

Rain Sensor Control Module:
The sensor consist on a module that connect to the sensing pad. This module produce an output voltage according to the resistance of sensing pad and we read it form AO pin. The signal is store to a LM393 Comparator to digitize it and gives output to Digital Output (DO) pin.

This module has built in potentiometer for adjusting the sensitivity of digital output (DO). You can set a threshold by using a potentiometer. So, that when the amount of water increase from the threshold value, the module give output LOW otherwise HIGH.
The module has two LEDs. One is power LED and second is Status LED. When we give power to the module the Power LED will ON. The Status LED will ON when the digital output goes LOW.
Working Principle of Rain Sensor:
The Rain Sensor Module operates by detecting the electrical resistance of water on its sensing plate.
How it works:
- The sensing plate has parallel exposed copper tracks.
- When dry, the resistance is high, and current flow is minimal.
- When rainwater bridges the gaps, resistance drops, allowing more current to flow.
- The module then outputs an analog voltage (proportional to moisture level) and a digital HIGH/LOW signal based on a preset threshold.
Example Sensor Values:
- 0–400: Heavy rain
- 400–800: Light rain or wet condition
- 800–1023: Dry
You can use either analog or digital output depending on whether you want gradual rain intensity or a simple rain/no rain status.
Components Required for Using Rain Sensor with Arduino:
- Arduino UNO (or compatible board)
- Rain Sensor Module (with sensor plate and control board)
- Jumper Wires
- Breadboard (optional)
- Buzzer or LED (optional for indication)
- USB Cable
- Arduino IDE installed
Rain Sensor Pinout:
It is easy to connect and use the rain sensor. Rain sensor has 4 pins to connect.
- AO (Analog Output) pin gives us an analog signal. Connect AO to analog pin on Arduino.
- DO (Digital Output) pin gives us Digital output. You can connect it to any digital pin on Arduino or directly to a 5V relay or similar device.
- GND is a ground connection. Connect GND pin of module to GND on Arduino.
- VCC pin supplies power for the sensor. Power up the sensor between 3.3V – 5V. The analog output will change depending on voltage, provided to the sensor.

Circuit Diagram of Rain Sensor with Arduino:
| Rain Sensor Pin | Function | Arduino Pin |
|---|---|---|
| VCC | Power Supply | 5V |
| GND | Ground | GND |
| AO | Analog Output | A0 |
| DO | Digital Output | D7 (Optional) |

Calibration of Rain Sensor:
Frist of all you have to calibrate the reading to get the accurate reading. The module has a built-in potentiometer for calibrating the digital output (DO).
You can set a threshold by turning knob of potentiometer. When the amount of water is increases than threshold value, Status LED will turn on and DO pin give LOW output.
Arduino Code for Rain Sensor:
Below is a simple sketch that reads analog values from the sensor and prints rain detection status on the Serial Monitor.
int rainSensor = A0;  // Analog pin connected to AO of Rain Sensor
int sensorValue = 0;

void setup() {
  Serial.begin(9600);
}

void loop() {
  sensorValue = analogRead(rainSensor);

  Serial.print("Rain Sensor Value: ");
  Serial.println(sensorValue);

  if (sensorValue < 500) {
    Serial.println("Rain Detected!");
  } else {
    Serial.println("No Rain.");
  }

  delay(1000);
}
Applications of Rain Sensor:
- Smart irrigation systems (pause watering if raining)
- Automatic window/roof closing systems
- Rain-activated wiper control for model vehicles
- Weather stations
- Rain alert systems with GSM, Blynk, or SMS integration
- IoT-based agriculture and garden monitoring
Precautions for Rain Sensor:
- Avoid direct connection of the sensor plate to 5V for extended periods; the plate may corrode. Use it in intermittent polling mode.
- Keep the sensor clean and free of dirt or corrosion.
- You can coat the back of the sensing plate with epoxy to waterproof it (keep front exposed).
Conclusion:
The Rain Sensor is an excellent addition to any Arduino-based weather or automation project. It’s simple, cost-effective, and integrates easily with digital and analog systems. Whether you’re designing an automatic greenhouse, smart roof, or rain alert system, this module is a perfect fit.
With just a few lines of code and some basic wiring, you can create intelligent devices that respond to the weather—making your projects smarter and more reliable.
Need Help in Setup of Rain Sensor with Arduino?
If you need any Help or Assistance for Setup of Rain Sensor with Arduino, with Modifications or Customization then you can contact us through WhatsApp. We can deliver you this Project in the Following Ways.


