Sound detection plays a critical role in real-world applications like voice-activated systems, home automation, security alarms, and noise monitoring. In this blog, we’ll explore how to use a sound sensor with Arduino to detect sound levels and trigger actions based on noise input.
Whether you’re building a clap switch, a sound-activated light, or an audio-level monitor, this guide will take you through everything you need to know.
What is a Sound Sensor?
A sound sensor module detects sound waves (usually from the environment) and converts them into electrical signals. It typically contains a microphone, a signal conditioning circuit, and an amplifier to process the signal.
Types of Sound Sensor:
- Analog Sound Sensor – Outputs continuous voltage based on sound intensity.
- Digital Sound Sensor – Outputs HIGH or LOW based on a set threshold.
We’ll be using the KY-038 or LM393-based sound sensor module, which is widely available and affordable.
How Microphone Works?
There is the small layer of diaphragm, it is actually the layer of capacitor. The plate which is situated on back is sound plate which is close and proportional to diaphragm.
When we speak the sound strikes to the diaphragm, causing it to vibrate. When diaphragm vibrates the capacitance changes because the plates are closer to each other.
When the capacitance changes the voltage on the plates changes, by measuring capacitance we can find the amplitude of the sound.
Components Required for using Sound Sensor:
| Arduino Uno (or Nano) | |
| Sound Sensor Module | |
| Jumper Wires | |
| Breadboard (optional) | |
| LED or Buzzer (optional, for output) |
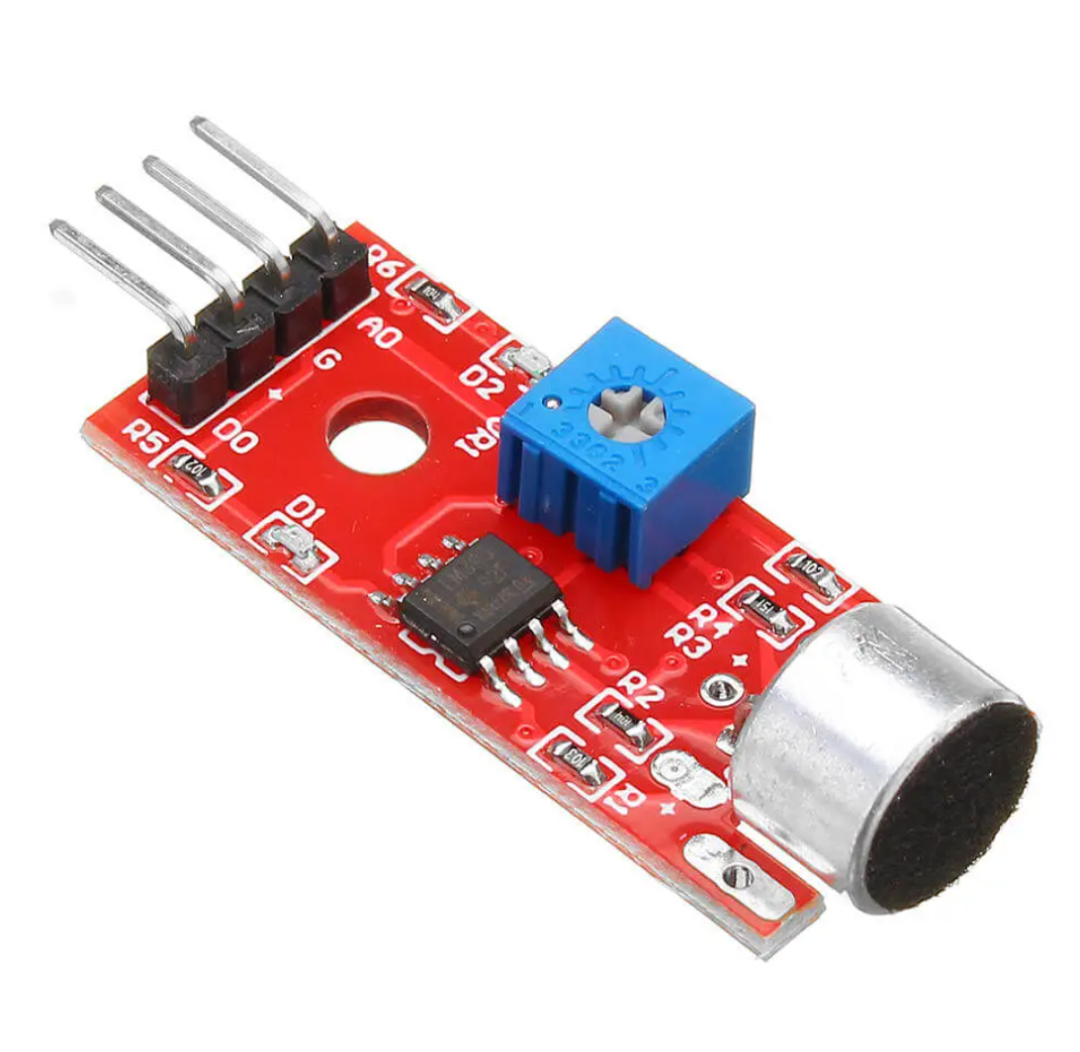
Working of Sound Sensor Module:
There is a small board on which a microphone and some extra components that convert sound waves in electrical signals.

There is built in potentiometer from which we can set the sensitivity of the out signal. You can set the threshold (pre-defined sound like someone enters) means when the amplitude of sound reach the threshold value it will turn on otherwise it will remain off.
Rotate potentiometer clockwise to increase sensitivity and rotate anti-clockwise to decrease the sensitivity.

There are two LED’s on the module the upper led shows the sensor is powered on and the other shows the status of the module.
Sound Sensor Pinout
There are 4 pins of the sound sensor.
| Pin Name | Function |
|---|---|
| VCC | Connect to 5V on Arduino |
| GND | Connect to GND on Arduino |
| A0 | Analog output (optional) |
| D0 | Digital output |
Circuit Diagram of Sound Sensor with Arduino:
For Digital Detection (D0):
| Sensor Pin | Arduino Pin |
|---|---|
| VCC | 5V |
| GND | GND |
| D0 | D2 (or any digital pin) |

For Analog Detection (A0):
| Sensor Pin | Arduino Pin |
|---|---|
| VCC | 5V |
| GND | GND |
| A0 | A0 |
Calibrating Sound Sensor
Before using the sensor we suggest you to calibrate the sensor first. To calibrate the sound there is the potentiometer. You can set threshold by rotating knob. So when the sound reached the threshold value, the status led will ON. And digital output will goes LOW.
Now clap near to the sensor and adjust sensitivity through potentiometer and see when the status led will glow according to your clap. Now the sensor is read to use.
Arduino Code for Sound Sensor:
Now after hooking up sensor with Arduino you need a sketch to get fully functional. This sketch detects your claps or snaps and print out results on the screen. Let’s start our sketch gets our project interesting.
#define sensorPin 7

// Variable to store the time when last event happened
unsigned long lastEvent = 0;

void setup() {
	pinMode(sensorPin, INPUT);	// Set sensor pin as an INPUT
	Serial.begin(9600);
}

void loop() {
	// Read Sound sensor
	int sensorData = digitalRead(sensorPin);

	// If pin goes LOW, sound is detected
	if (sensorData == LOW) {

		// If 25ms have passed since last LOW state, it means that
		// the clap is detected and not due to any spurious sounds
		if (millis() - lastEvent > 25) {
			Serial.println("Clap detected!");
		}

		// Remember when last event happened
		lastEvent = millis();
	}
}
When everything works properly you should see the result as clap detected.

Limitations and Tips for Sound Sensor:
- Not ideal for precise audio analysis – These are simple sound detectors, not audio processors.
- Avoid noisy environments for accurate threshold settings.
- Use shielded wires or a case if you’re placing the sensor far from the Arduino.
Conclusion:
Using a sound sensor with Arduino is a fun and useful way to integrate audio-based interaction in your projects. Whether you’re making a simple clap switch or a noise-monitoring device, this versatile sensor provides an easy entry point into sound-based control systems.
Need Help in Setup of Sound Sensor with Arduino?
If you need any Help or Assistance for Setup of Sound Sensor with Arduino, with Modifications or Customization then you can contact us through WhatsApp. We can deliver you this Project in the Following Ways.