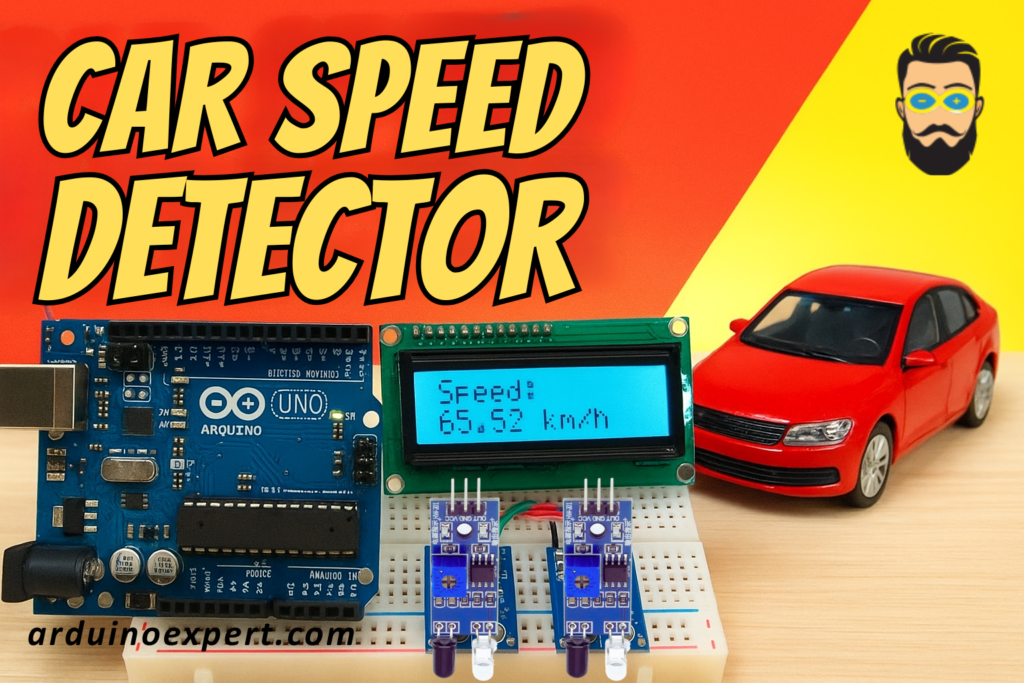
Traffic monitoring systems are an essential part of modern road safety. In this project, we will build a Car Speed Detector using Arduino UNO, which measures the speed of a toy car or any moving object by using two IR Sensor Modules placed a fixed distance apart. The measured speed is then displayed on an I2C LCD display in real-time.
This project is simple, low-cost, and perfect for students, electronics beginners, engineering projects, and science fair demonstrations. We have also uploaded the working video/short on our YouTube channel, showing the full demonstration of the car speed measurement system.
Project Overview: Car Speed Detector
The idea is very straightforward:
- Two IR sensors are placed a known distance apart (for example, 10 cm or 20 cm).
- When a car/object passes the first sensor, Arduino starts a timer.
- When the same object crosses the second sensor, Arduino stops the timer.
- Using Speed = Distance / Time, Arduino calculates the object’s speed.
- The result (in cm/s or km/h) is shown on the I2C LCD.
This project teaches important concepts of timing, interrupts, distance calculation, sensor interfacing, and real-world applications of microcontrollers.
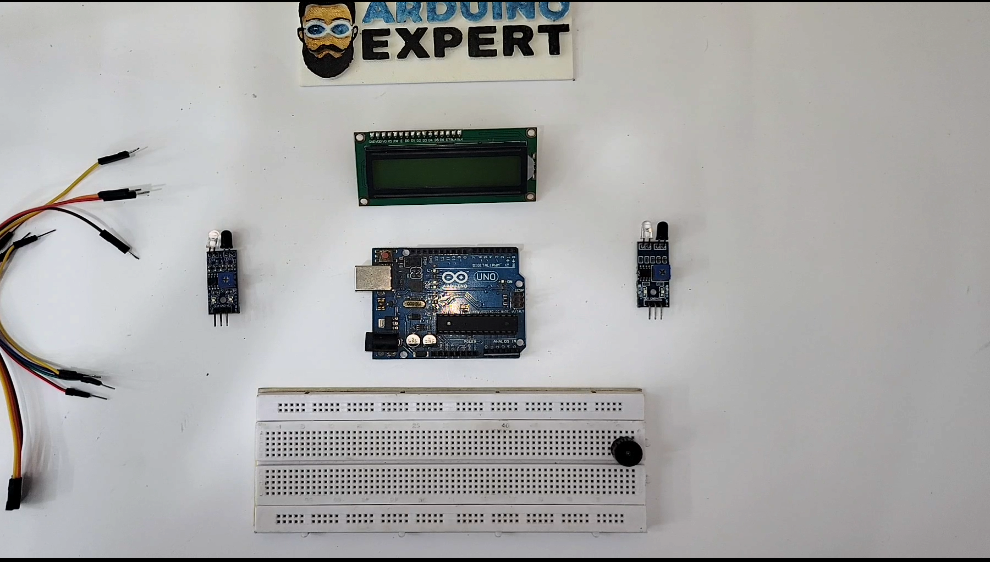
Components Used in Car Speed Detector Project
| Component | Quantity | Description |
|---|---|---|
| Arduino UNO | 1 | Main controller |
| IR Sensor Module | 2 | Detects passing object |
| I2C LCD Display (16×2) | 1 | Displays calculated speed |
| Breadboard | 1 | For wiring |
| Jumper Wires | As needed | Connections |
| Toy Car / Moving Object | 1 | For testing |
Working Principle of Car Speed Detector
Step 1: Object crosses Sensor 1
The IR sensor detects an interruption and sends a signal to Arduino.
Arduino starts counting time (using micros() or millis()).
Step 2: Object crosses Sensor 2
The second IR sensor detects the object.
Arduino stops the timer.
Step 3: Speed Calculation
If the two sensors are placed D cm apart, and the measured time is T milliseconds, then:
Speed (cm/s) = (Distance in cm / Time in seconds)
Speed (km/h) = (cm/s × 0.036)
Step 4: Display
Speed is shown on the I2C LCD with clear formatting.
Arduino Code for Car Speed Detector
#include <Wire.h>
#include <LiquidCrystal_I2C.h>

// I2C LCD address 0x27 or 0x3F depending on module
LiquidCrystal_I2C lcd(0x27, 16, 2);

// IR Sensor Pins
#define SENSOR1 2
#define SENSOR2 3

// Distance between sensors (in centimeters)
float distance_cm = 20.0;   // Change according to your setup

unsigned long startTime = 0;
unsigned long endTime = 0;
bool firstSensorTriggered = false;

void setup() {
  lcd.init();
  lcd.backlight();

  pinMode(SENSOR1, INPUT);
  pinMode(SENSOR2, INPUT);

  lcd.setCursor(0, 0);
  lcd.print(" Car Speed ");
  lcd.setCursor(0, 1);
  lcd.print("  Detector ");
  delay(2000);
  lcd.clear();
}

void loop() {

  // Detect object at Sensor 1
  if (digitalRead(SENSOR1) == LOW && !firstSensorTriggered) {
    startTime = micros();
    firstSensorTriggered = true;

    lcd.clear();
    lcd.print("Detected S1");
    delay(300);
  }

  // Detect object at Sensor 2
  if (digitalRead(SENSOR2) == LOW && firstSensorTriggered) {
    endTime = micros();
    firstSensorTriggered = false;

    unsigned long timeTaken = endTime - startTime;  // in microseconds

    float timeSec = timeTaken / 1000000.0;          // convert to seconds
    float speedCMS = distance_cm / timeSec;         // speed in cm/s
    float speedKMH = speedCMS * 0.036;              // convert to km/h

    lcd.clear();
    lcd.setCursor(0, 0);
    lcd.print("Speed:");

    lcd.setCursor(0, 1);
    lcd.print(speedKMH, 2);
    lcd.print(" km/h");

    delay(2000);
    lcd.clear();
  }
}
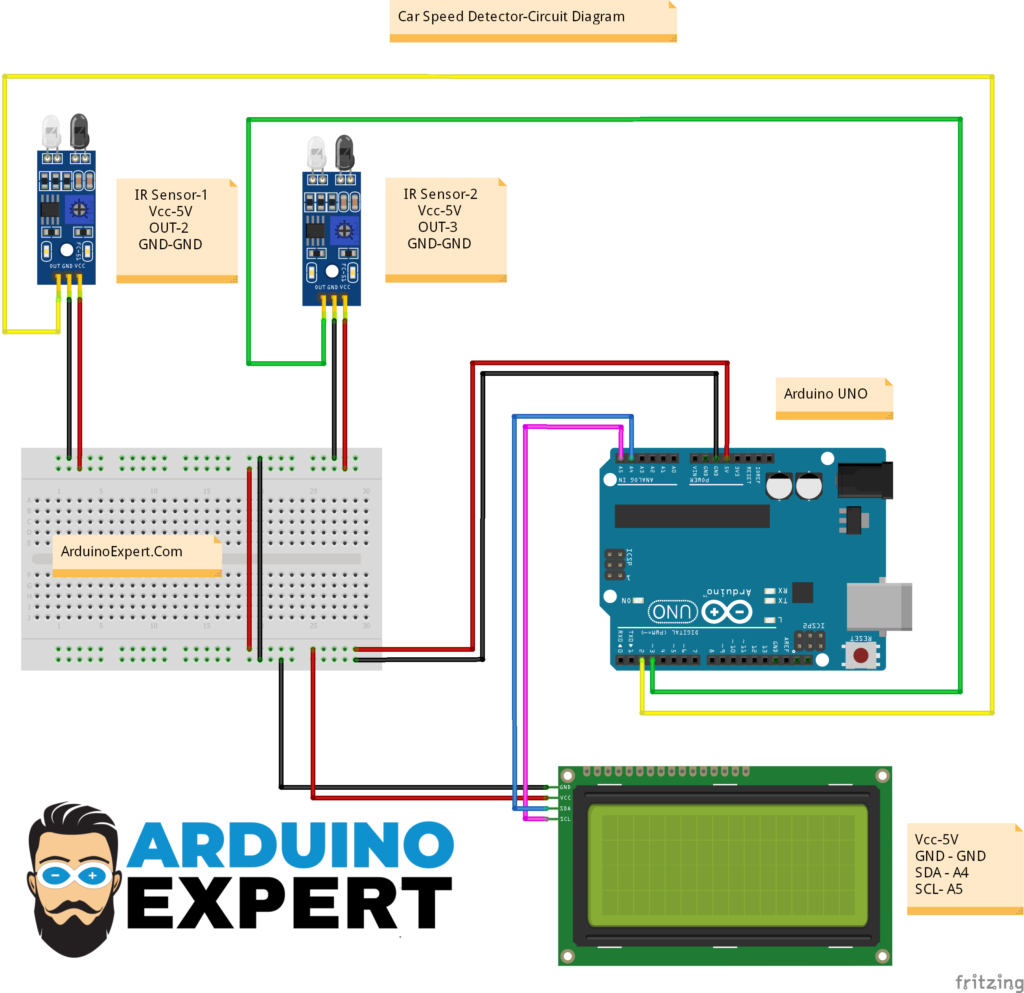
Circuit Diagram of Car Speed Detector with Arduino
- IR Sensors
- OUT pins connected to Arduino digital pins (2,3)
- VCC and GND powered from Arduino
- I2C LCD (16×2)
- Only uses SDA (A4) + SCL (A5) pins
- Extremely simple connections
- Arduino UNO
- Handles time measurement
- Performs speed calculation
- Updates display
The entire circuit fits neatly on a breadboard, making it perfect for beginners.
Project Setup
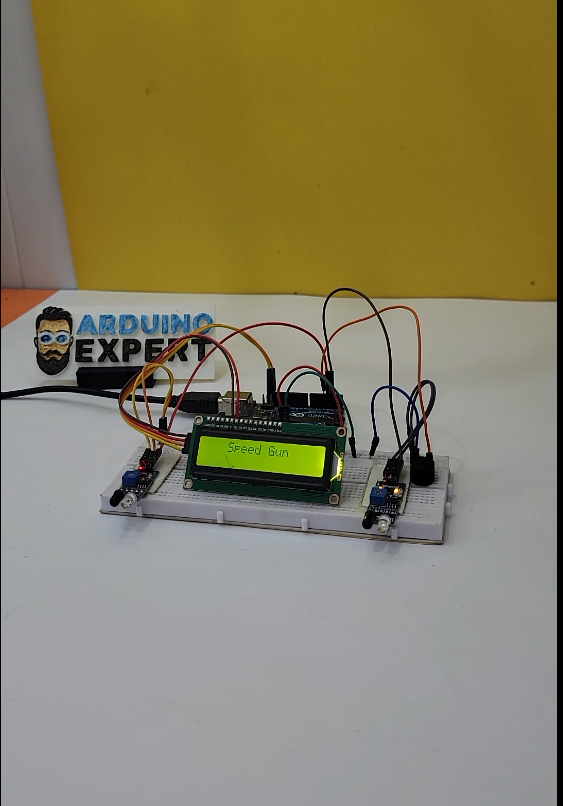
Working Video of the Car Speed Detector Project
Applications of the Project
This project is useful in:
- Smart traffic systems
- Toy car and robot speed testing
- School & college engineering projects
- Road safety prototype demonstrations
- Physics experiments (motion & velocity measurement)
- IoT-based vehicle monitoring systems
Conclusion
The Car Speed Detector with Arduino is an excellent project to learn real-world applications of sensors, timing functions, distance calculations, and display interfacing. The use of dual IR Sensors provides accurate detection, while the I2C LCD gives a clean, readable output.
Don’t forget to watch the working video on our YouTube channel to see the full setup and speed measurement demonstration.
This project is a great addition to any Arduino Projects Collection, and it can be expanded using Bluetooth, ESP32 Wi-Fi, SD Card logging, or even radar modules.
Need Help/Assistance in Arduino Car Speed Detector Project?
If you need any help or assistance in Car Speed Detector Project with or without Modifications/Customization then you can contact us through WhatsApp.
Learn More about the services we offer